How to Use the DigiTube
CAUTION: If skin is broken or burned, apply sterile gauze or sterile bandaging before using this device. If discomfort or pain results, persists or increases, or if rash develops, discontinue use and consult a physician.

NON-STERILE / NOT MADE WITH NATURAL RUBBER LATEX
HOW DIGITUBE HELPS SUPPORT AND PROTECT AN INJURED DIGIT
Understanding the concept will help you understand these instructions. Digitube allows an injured finger to slide and float freely inside a tubular plastic shell (The “Tube”). The Tube has a slippery interior surface. Correct sizing provides space around the injured digit. The length of the tubular shell is adjusted to extend beyond the end of the injured digit. The Tube surrounds the injured digit but is not attached to the injured digit. The result is that the injured digit is isolated from most harmful forces.
GETTING STARTED
COMPRESSION SLEEVES
Using the enclosed compression sleeves is not required, but a compression sleeve should help reduce swelling, and it will provide better isolation from forces by providing more slippery contact with the tube.
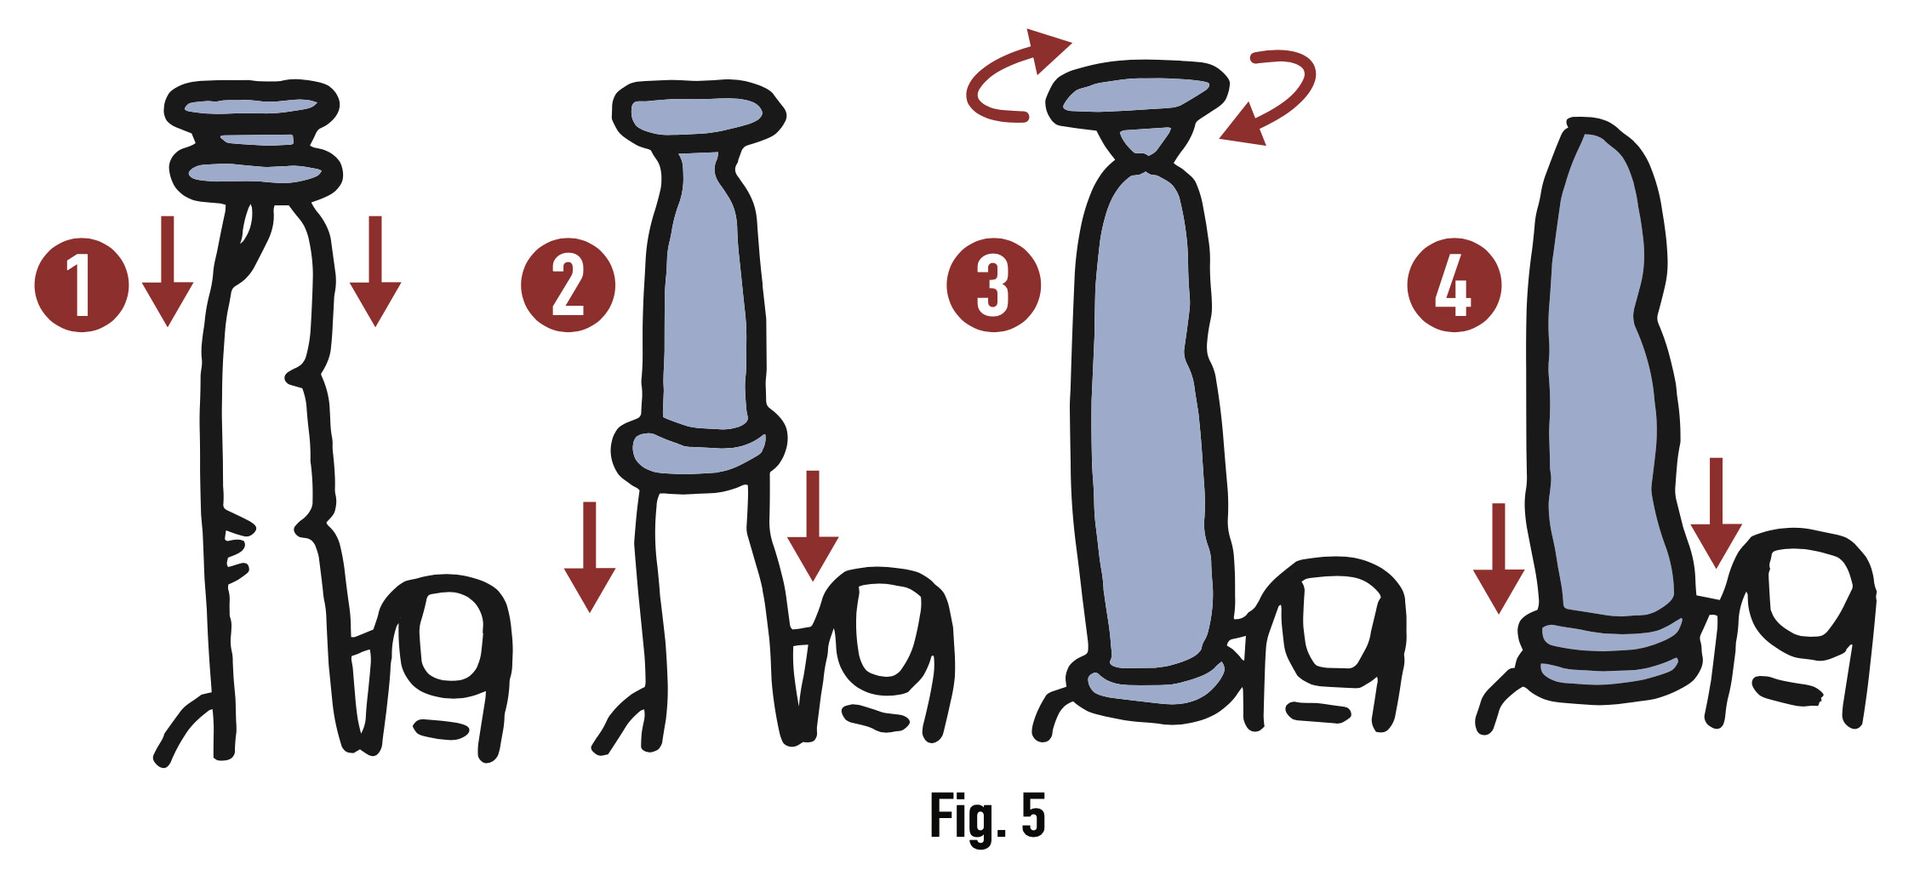
The compression sleeves can be applied in a single or double layer. The double layer application provides more compression and provides assured coverage of the fingertip, thus assuring optimum slippery contact with tube. Application as a double layer is as shown in
Fig. 5.
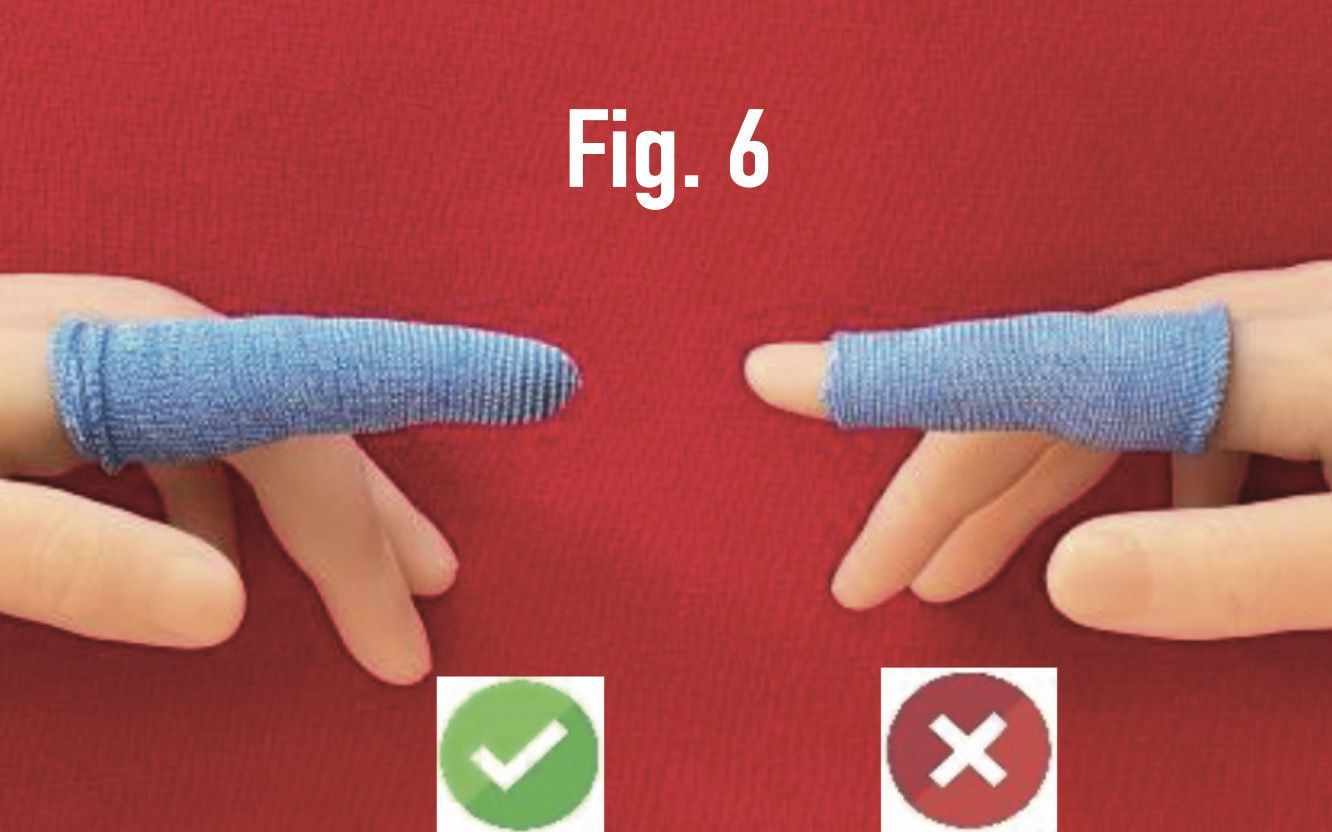
For application in a single layer, roll one end onto the finger, and cut the fabric coming off the tip of the finger, leaving excess fabric on the end. If a compression sleeve is applied in this way, be sure to avoid leaving the tip of the finger exposed, as illustrated in Fig. 6.
CHOOSING THE TUBE DIAMETER
(your kit contains two sizes)
After any compression sleeve and/or any other bandaging is applied, select the smallest tube diameter that surrounds the injured digit with enough space around the digit to allow the tube to fall off the digit if the tube is pointed down with no attachment strap. As swelling or bandaging is reduced, a smaller tube diameter may be considered for use.
SETTING THE TUBE LENGTH
Using the adjustment lever
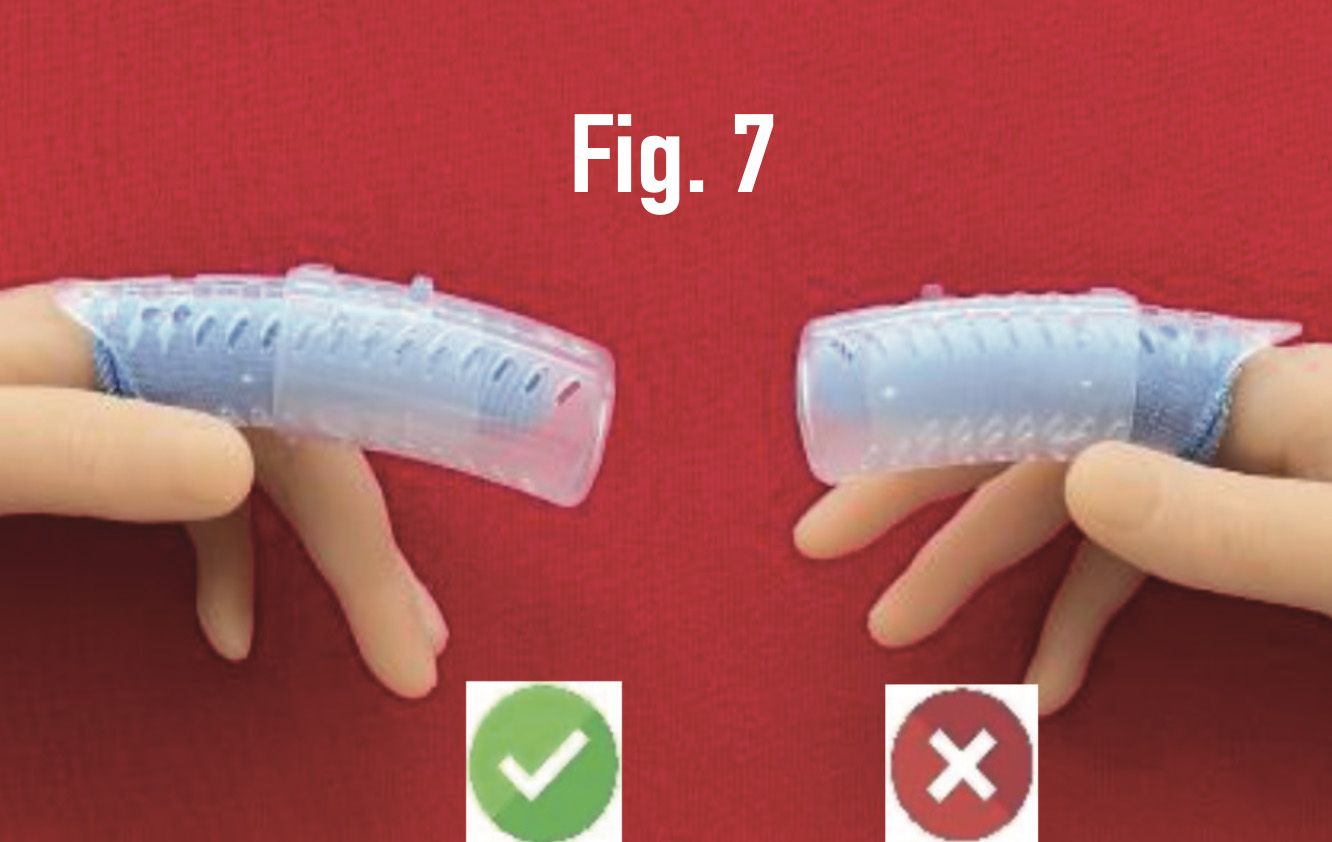
(Fig.1), set the length of the tube to extend beyond the end of the injured digit. DO NOT SHORTEN THE TUBE LENGTH TO A POINT THAT ALLOWS THE END OF THE TUBE TO PUSH ON THE END OF THE DIGIT
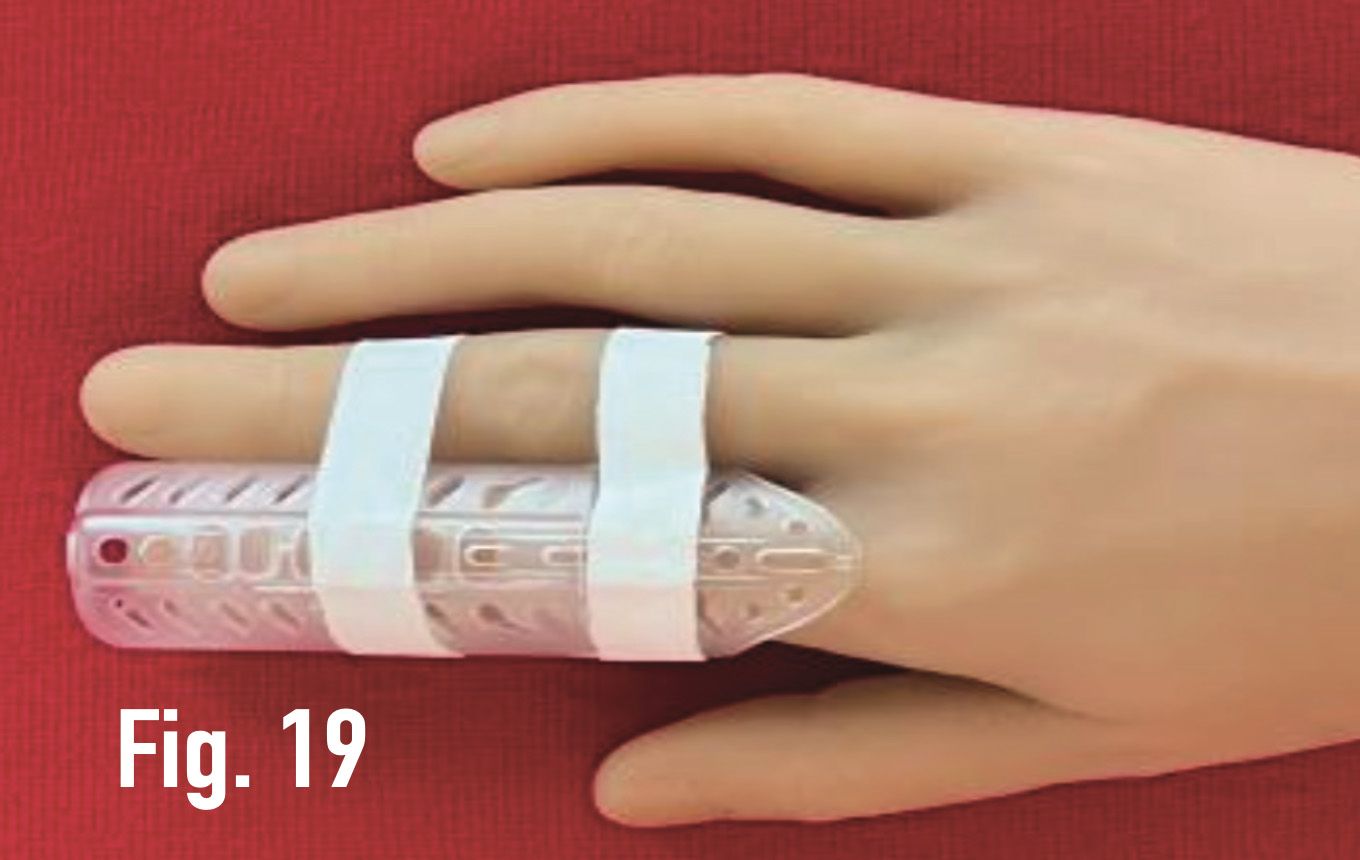
(Fig. 7). In the rare event that the tube cannot be set long enough to prevent contact with the end of the digit, adhesive bandaging can be used to hold the tube off the end of the finger. (Fig. 19)
CHOOSING THE FINGER STRAP OR WRIST STRAP
Choose whether you will use a finger strap or a wrist strap to hold the tube in place. For an injured thumb, you should use the wrist strap. For an injured finger, the choice is usually a matter of personal preference and may be influenced by which finger is injured.
USING THE DIGITUBE FINGER STRAP
(Not intended for use with thumbs.)
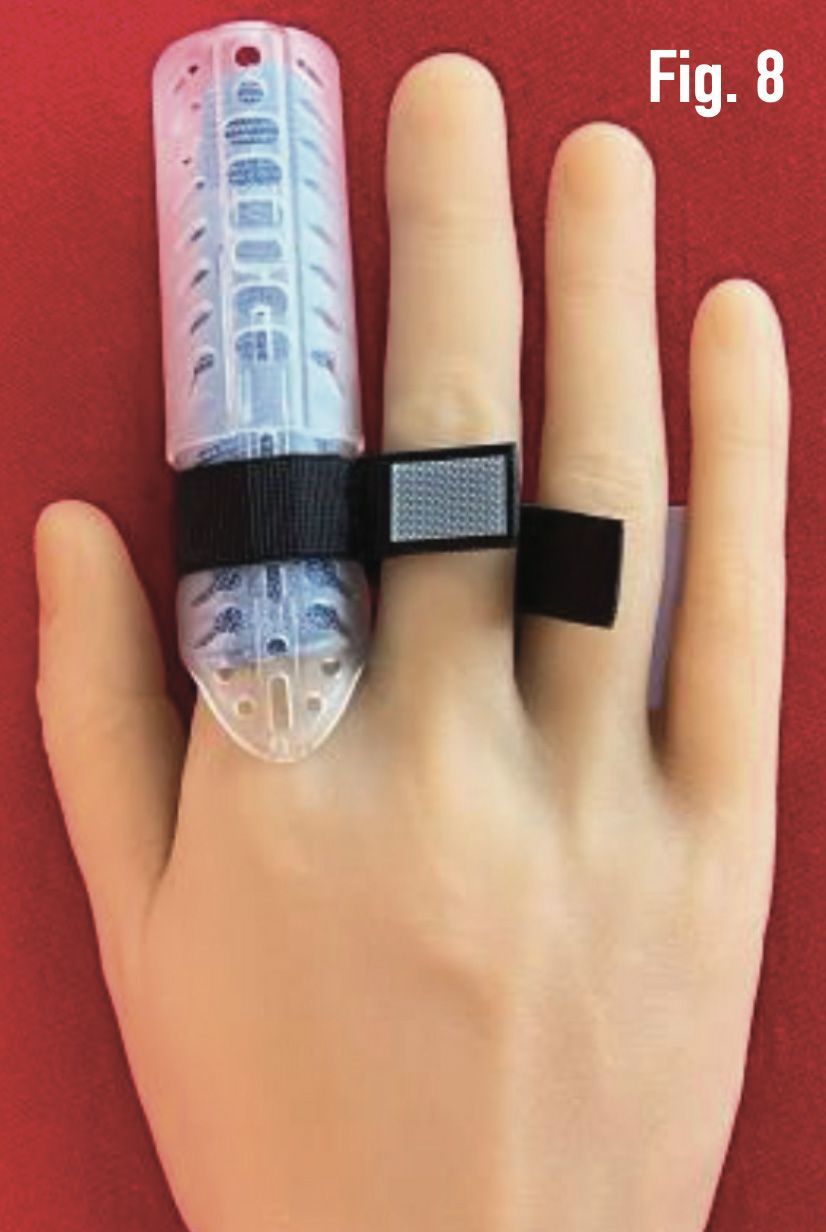
1.Slide the closed loop of the strap over the device as shown. Position the open loop (with the white hook material facing up) on the side you choose for connecting the device to a buddy finger (Fig. 8).
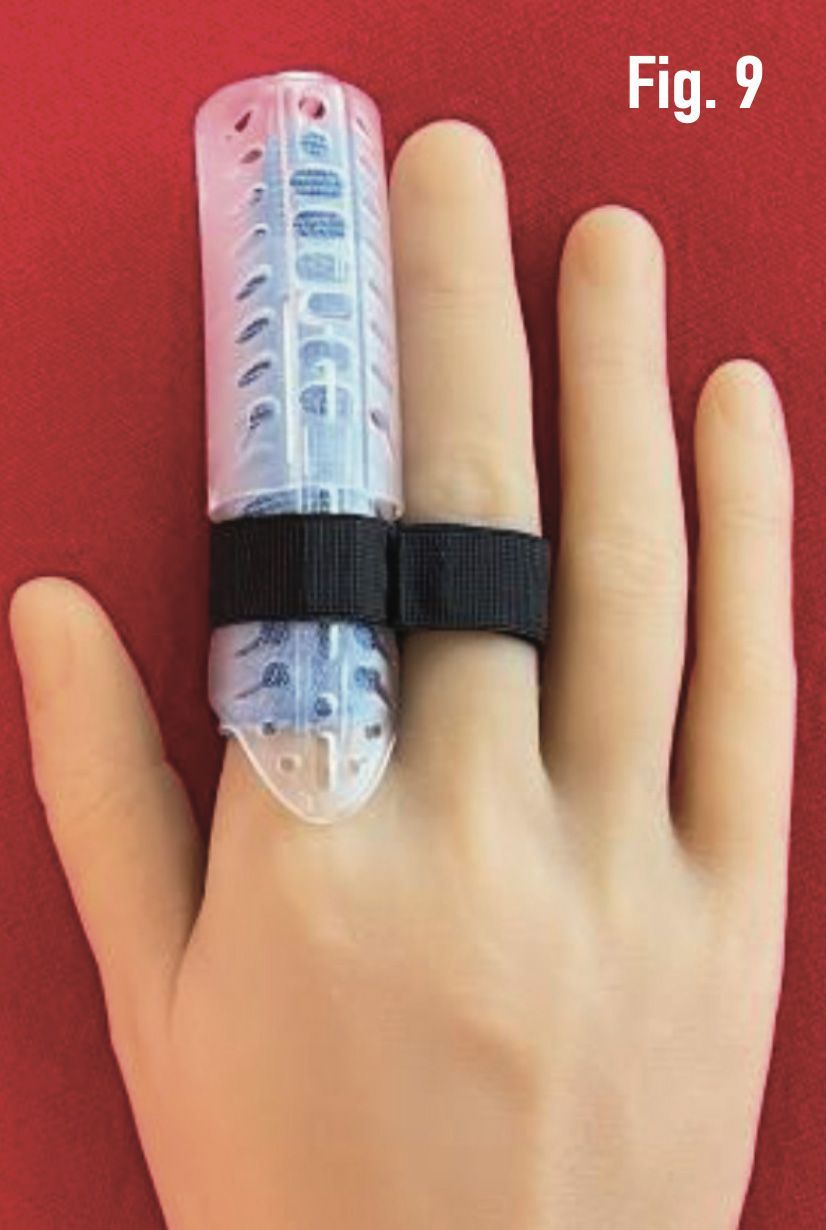
2. Slide the device over the injured finger and secure the open loop around the buddy finger (Figs. 8 & 9).
3. Rotate and/or slide the device in the closed loop to position the device for alignment and comfort.
4.When the desired fit has been established by testing for several hours, the loose end of the strap can be cut to length for convenience and appearance as shown (Fig. 9). (Note: avoid leaving any white hook fabric exposed to prevent it from catching on clothing).
5.
CAUTION:
Ensure that the finger strap is not uncomfortably tight, and that blood flow to the buddy finger is not restricted
(Fig. 9).
USING THE DIGITUBE WRIST STRAP
(For use with fingers and thumbs.)
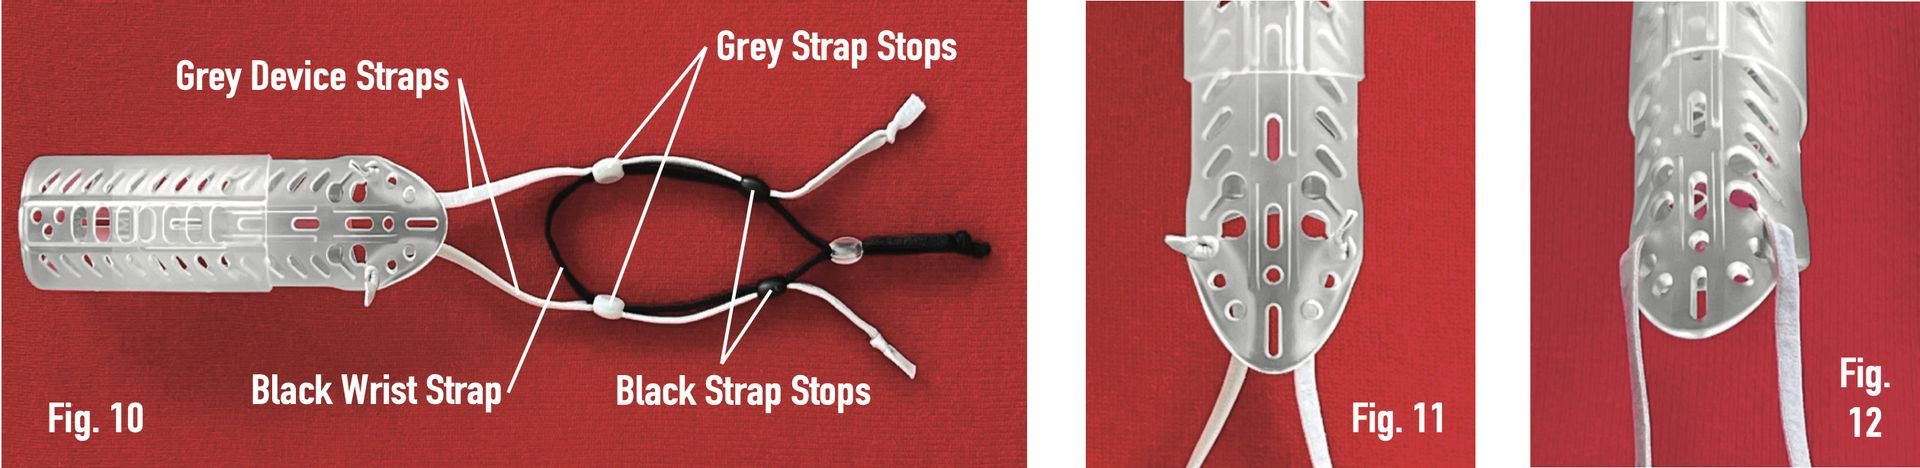
Place the assembled device and wrist strap on a table as shown (Fig. 10). Insert the knotted ends of the grey device straps into the keyholes on the device and pull the straps into the narrow slot. This can be done by inserting the knotted ends from the inside, leaving the ends of each strap on the outside (Fig. 11), or from the outside leaving the ends of each strap on the inside (Fig. 12). Once the device is in place on a digit, both methods should hold the straps in place properly, but if the device is left dangling from the wrist at times, the straps pointed to the outside may stay in place better.
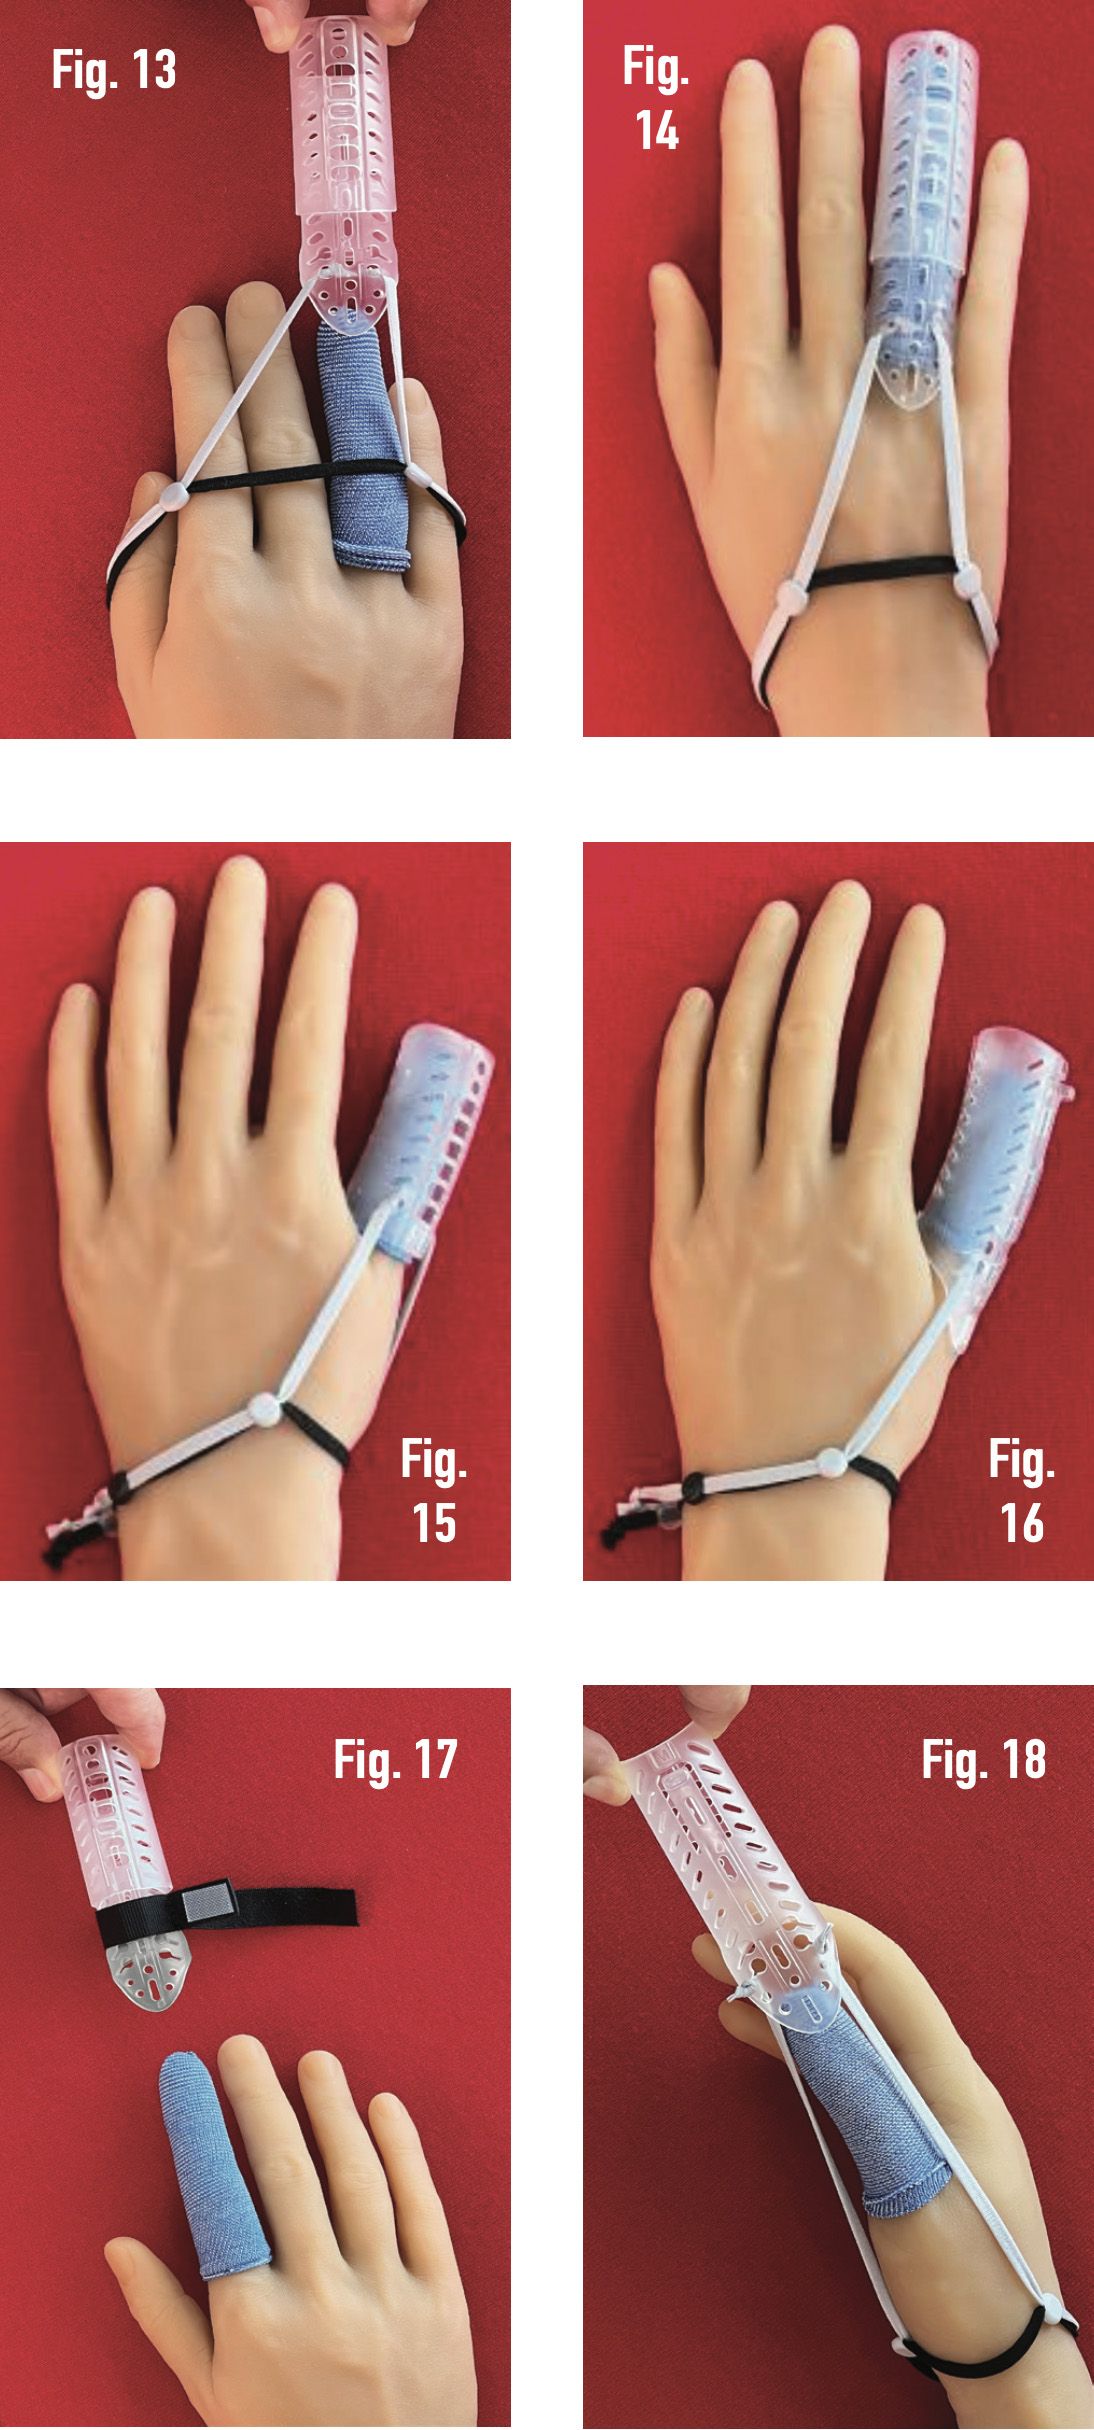
Insert the entire hand through the black wrist strap as shown (Fig. 13) and slide the tube over the injured digit (Fig. 14).
Adjust all straps and strap stops to provide a comfortable fit. The grey strap stops are used for adjusting the length of the grey device straps and for positioning the angles of those straps. The black strap stops are intended to be used to take up slack in the grey device straps (and to provide spare length in case you change the settings). For a better appearance, untwist all straps so that they lie flat.
The strap settings need not be very tight – probably only tight enough to prevent the tube from sliding down on an injured digit when the hand is swinging down.
After confirming a desired fit for several hours, the strap ends can be re-knotted and trimmed to reduce any dangling ends.
The wrist strap can work for various thumb applications (Figs. 15 & 16), including using the complete tube, the tube tip, or the tube base. Each tube component has keyholes for the wrist strap attachment.
EASY AND QUICK TO REMOVE AND RE-APPLY
Prolonged immobilization of joints can cause significant damage to joint tissues. Digitube is easy to remove and re-apply, allowing frequent flexing and extending of finger joints when safe and appropriate (Figs. 17 & 18).
Adhesive bandaging can be employed when it is desirable to prevent easy removal of the device
(Fig. 19).